Vous pourriez avoir besoin de
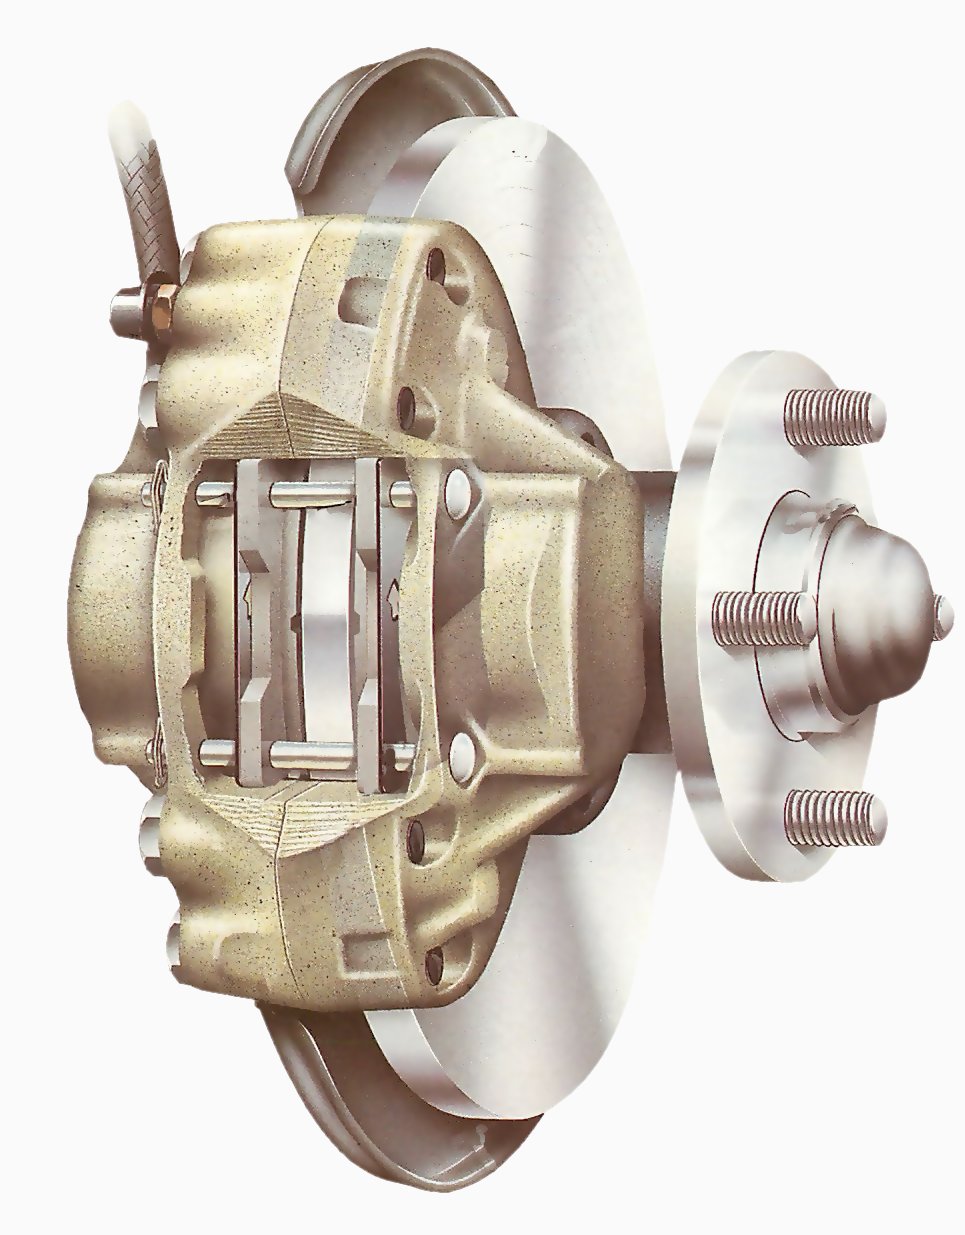
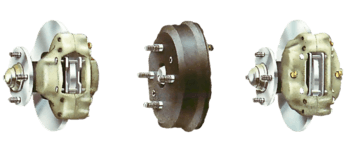
A piston-opposed caliper-type disc brake is fitted to many small and medium cars.
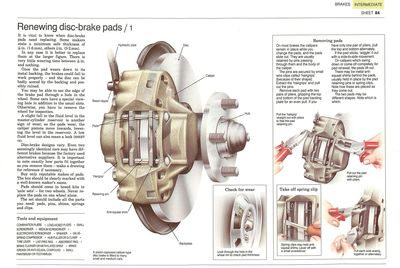
It is vital to know when disc-brake pads need replacing. Some makers state a minimum safe thickness of 1.6mm, others 3.2mm.
In any case it is better to replace them at the larger figure. There is very little wearing time between 1 in. and nothing.
Once the pad wears down to its metal backing, the brakes could fail to work properly - and the disc can be badly scored by the backing and possibly ruined.
This video course is the best way to learn everything about cars.
Three hours of instruction available right now, and many more hours in production.
- 4K HD with full subtitles
- Complete disassembly of a sports car
You may be able to see the edge of the brake pad through a hole in the wheel. Some cars have a special viewing hole in addition to the usual slots. Otherwise, you have to remove the wheel for inspection.
A slight fall in the fluid level in the master-cylinder reservoir is another sign of wear; as the pads wear, the caliper pistons move inwards, lowering the level in the reservoir. A low fluid level can also mean a leak (See Looking for leaks in the brake system).
Check for wear
Look through the hole in the wheel rim to check pad thickness. Feel with your finger if you are unable to see, but be careful of hot brake discs just after driving.
Disc-brake designs vary. Even two seemingly identical cars may have different brakes because the factory used alternative suppliers. It is important to note exactly how parts fit together as you remove them - make a drawing for reference if necessary.
Buy only reputable makes of pads. The box should be clearly marked with a well-known maker's name.
Pads should come in boxed kits in `axle sets' - for two wheels. Never replace the pads on one wheel alone.
The set should include all the parts you need: pads, pins, shims, springs and clips.
Removing pads
On most brakes the calipers remain in place while you change the pads, and the pads slide out. They are usually retained by pins passing through them and the body of the caliper.
Pull out the pad retaining clip with pliers.
The pins are secured by small wire clips called 'hairgrips' (because of their shape). Extract the 'hairgrips' and pull out the pins.
Remove each pad with two pairs of pliers, gripping the top and bottom of the pad backing plate for an even pull. If you have only one pair of pliers, pull the top and bottom alternately .
If the pad sticks, 'wiggle' it out with a side-to-side movement.
Pull each side evenly, together or alternately.
On calipers which swing down or come off completely for pad renewal, the pads lift out.
Take off spring clip
Spring clips may hold anti-squeal shims. Lever off with a small screwdriver.
There may be metal anti-squeal shims behind the pads, usually held in place by the pad retaining pins or spring clips. Note how these are placed as they come out.
The two pads may be different shapes. Note which is which.
Replacing the pads
Using a G-clamp
You may be able to use a G-clamp to press the brake piston back. Screw up the clamp against the outside of the caliper.
New replacement pads are thicker than the old, worn ones. You need to push the pistons back to make room for them.
To do this, you can use a valve-spring compressor or a carpenter's G-clamp.
A strong but careful pressure is needed to lever the piston back.
On calipers that are fixed in place, you need to lever the pistons back with a strong flat bar, such as a tyre lever. But be very careful not to scratch them.
Pushing the pistons back forces fluid back into the master-cylinder reservoir. If fluid spills on to the paintwork it will cause damage, so wrap an absorbent rag around the mouth of the reservoir.
Wrap some rag around the mouth of the reservoir to absorb any brake fluid that may overflow.
If any fluid is accidentally spilled, wipe it off at once.
You may need to scrape the paint off the edges of the backing plates of the new brake pads to allow them to move freely in their housings. They must not stick.
However, do not remove paint unless it is really necessary - it can lead to corrosion and sticking brakes.
Loosening the brake bleed nipple
Another way of releasing brake fluid is to open the bleed nipple slightly, with a bleed pipe fitted.
Alternatively, open a bleed nipple on the caliper - but close it while fluid is still running out, or air may get in. If this happens, you will have to bleed the brakes.
Preparing and fitting new pads
Smear pad backs and shim fronts with special anti-squeal grease. Do not get any on the friction material.
Once you have made sure that the new disc-brake pads fit in smoothly, smear the backs of the pads and the fronts of the anti-squeal shims (if any are fitted) with either brake grease or an anti-squeal compound.
Do not smear the fronts of the pads with grease, or anti-squeal compound, and make sure none of it gets on to the friction material or disc. bar. Forcing one piston back can cause the other to move forward or even fall out.
Avoid this by reinserting the old pads temporarily - clean them first.
Replace anti-squeal shims with the arrow pointing in the direction of forward rotation.
Refit the pads and any shims or spring clips. If the shims are marked with arrows, fit them with the arrow pointing in the direction of forward rotation.
Align all the holes to admit the pad retaining pin.
Use a slim electrician's screwdriver to line up the holes in the pads and anti-squeal shims.
Push in the new pins and fasten them with new 'hairgrips'.
Refitting and checking
Top up the brake fluid if necessary.
Reconnect any electrical sensor leads there may be, and refit the wheels. Press the brake pedal several times to position the pads and restore the correct pedal travel.
Check the fluid level in the master-cylinder reservoir and top it up if necessary.
Drive with extra care for the next few hundred miles. It takes a while for the new pads to bed in fully and give the full braking effect.
Girling A brakes
Some types have one two-pronged pad-retaining pin as shown; types with two pins are very similar.
The Girling A brake system is known as a two-piston sliding-yoke type, and is fitted to a number of popular cars.
The two pistons are both on the inner side of the disc, in a cylinder housing bolted rigidly to the hub. A yoke bridging the disc is free to slide sideways.
Loose the bolt of the pin-retaining clip and remove the nut, bolt and clip. Use a screwdriver to lever the anti-rattle spring off the pin.
Applying the brakes forces the pistons apart. One piston pushes a brake pad against the disc, the other moves the yoke towards the disc to pull the pad on the other side against the disc.
To ensure an even pull, use two pairs of pliers to draw out the pin.
The pads are retained by a pin (or pins) that also secures an anti-rattle spring. There may be a single two-pronged pad-retaining pin through the yoke and the pads, secured by a clip held down by a bolt.
Or there may be two separate pins secured by hairgrip clips or a wire clip.
Pull out the direct pad with two pairs of pliers. To free the indirect pad, lever the yoke with a screwdriver.
If one of the pads has a wear sensor, this should be fitted on the direct side - that is, the side that has the cylinder.
Girling XD48 brake
Girling XD48 brake
Do not confuse the caliper springs with the flat guides.
The Girling XD48 brake has a single piston operating in a cylinder body that slides sideways.
The piston presses one pad against the disc, and pulls the body across to apply the pad on the other side of the disc.
Pull out the split pins and push down on the body to free the guides, which slide out sideways.
The body slides along guides retained by split pins. Remove the split pins, push down on the body and pull the guides out sideways - if necessary tap them out with a drift. Lift off the body to expose the pads.
To lift the body clear, push down one end then pull up the other. Support the body to avoid straining the hose.
Support the body by attaching it with string to a convenient point. Do not leave it hanging on the hose end; this can damage the hose.
Note that each pad has a spring at the end nearest the bleed screw. When refitting the pads, take care to slide these springs back carefully and at the right end.
Girling Colette brakes
Unscrew the pin-retaining bolt to free the pin.
Girling Colette and certain ATE brakes are fitted to some British and European cars, and also built under licence for Japanese cars.
Like the Girling XD48, they have a single piston and a body sliding on two pins; when the bolt from one pin is removed, it swings out on the other pin to expose the pads.
The body swings out on the other pin to expose the pads.
The pins have dust seals, which must not be twisted. Each pin has flats under the head of the pin-retaining bolt; the flats enable you to hold the pin steady with an open-ended spanner while you unscrew the bolt.
Instead of pin-retaining bolts, some front-wheel-drive cars with similar brakes have socket-headed bolts that need a 7 mm Allen key.
When you swing the body out, support it to avoid straining the hose.
Some pads have a separate damping spring fitted over the top. Others have built-in springs. If one pad has a wear-sensor lead, this is fitted on the inner side.
Lockheed brakes
The Lockheed Light Duty brake, as well as Bendix or ATE opposed two-piston types, is fitted to a wide range of European cars.
The design is basically similar to the Girling brake; the pads slide out in the same way. Sometimes there are anti-squeal shims behind them.
Large split pins are used to hold the Lockheed cylinder body, and there is an anti-rattle spring (or springs) under the pins.
Straighten the pins, and pull out and discard them. Use new split pins for reassembly, and remember to splay their ends.
Bendix and ATE types, however, use solid pins, some of which have to be removed with a drift gently tapped with a hammer.
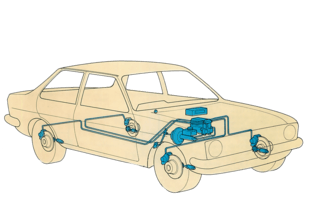
The Lockheed 4X36MB brake has four pistons in its caliper, each pair worked by a separate brake hose - a dual-system safety device.
When removing the pads, first disconnect the wear-sensor lead.
Freins Girling and Bendix brakes
Freins Girling and Bendix brakes are fitted to various French and Italian cars. They resemble the Girling XD48, but instead of body guides retained by split pins they have wedges held by a hairgrip clip at each end.
Note which way round the wedges fit before removing the clips. Tap out the wedges with a drift . Remove the body in the same way as for the XD48.
Push back the piston with a valve-spring compressor or G clamp to make room for the thicker, new pads.
Japanese units
Most Japanese brakes are much the same as the types covered.
The single-piston or double-piston sliding-caliper brakes fitted to some Datsun models may differ in detail from the Girling XD48 or A. The pads are secured by pins, sometimes with hairgrip clips, and may have an anti-rattle spring plate or an anti-squeal spring fitted over them.
More recent Japanese models have different ways of retaining the pins with a coil spring, for example.

