The strobe light is usually connected between the sparkplug and the plug cap.
A static timing check with the engine stationary is never fully accurate. It does not allow for wear or backlash - working clearance - in the distributor drive.
For greater accuracy, check the timing while the engine is running, using a stroboscope. First make sure that the contact-breaker points are adjusted correctly (See Fitting and adjusting contact-breaker points).
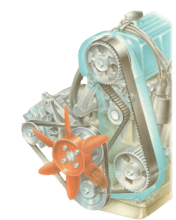
The work is done in close proximity to drive belt(s) and pulleys - take care that loose clothing or your hair does not become entangled.
This video course is the best way to learn everything about cars.
Three hours of instruction available right now, and many more hours in production.
- 4K HD with full subtitles
- Complete disassembly of a sports car
A stroboscope is simply a light connected to the sparkplug of the cylinder that is used for timing.
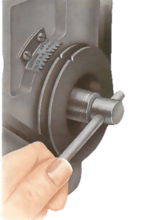
Every time the plug fires, a timing mark on the crankshaft pulley is just passing a fixed pointer on the engine.
The strobe light is a xenon or neon flash tube, which flashes very briefly at the moment of firing, so that the timing mark is lit only when it is opposite the fixed pointer.
As this happens again and again, the effect is to make the mark appear stationary.
If you advance or retard the ignition, the mark appears to move a short way and then stop in a new position.
Buy or hire a xenon strobe if possible, for it is brighter than the cheaper neon type.
Most strobes have a metal spacer connection which fits between the sparkplug and the plug cap, but more expensive models have an 'inductive trigger' that clips around the plug lead and can be fitted and removed while the engine is running.
The timing must be set at an exact engine speed.
If your car has a tachometer - or rev counter - use this to measure the engine speed. Alternatively, use a separate unit - which can be read from under the bonnet.
Find out from a car handbook or a dealer the maker's stroboscopic timing figure, and which cylinder to use for the check (almost always No. 1).
Find also whether to measure with the vacuum-advance mechanism disconnected or not - the centrifugal-advance system is never disconnected.
A typical timing figure is 13/1,000, meaning 13 degrees before top dead centre (BTDC) at 1,000 rpm. The figure may be the same as the static figure.
If it is stated for a high engine speed there may be a tolerance of a few degrees, for example 31-33/3,000.
You may be able to find out the whole 'advance curve' for different speeds. This set of measurements is always made with the vacuum advance disconnected, so it shows whether the centrifugal-advance mechanism is working properly.
Typical figures are 10-14/1,000; 20-24/3,600; and 26-30/4,800.
If you cannot get a stroboscopic timing figure, use the static figure and set the timing with the vacuum advance disconnected and the engine idling as slowly as possible.
Work in a shaded place so that the light shows the marks clearly. Find the mark or marks that you need, and dot them with white paint or chalk so that they stand out.
The vacuum advance
Vacuum advance check
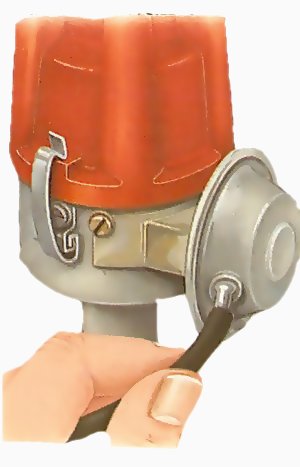
If you disconnect the vacuum advance at 2,00rpm, the strobe should show a less advanced timing position.
Stroboscopic timing is usually done with the vacuum-advance mechanism disconnected. You can also use the strobe to check whether the advance is working properly.
Run the engine at about 2,000 rpm. Disconnect the vacuum tube quickly while watching the timing mark. The mark should jump to a less advanced position and return when you reconnect the vacuum tube.
Connecting the strobe
The strobe light is usually connected between the sparkplug and the plug cap.
Follow the manufacturer's instructions supplied with the timing light you are using. If it is the type that is powered by the car battery, make sure you connect the leads the right way round.
There is also a connection to the plug of the cylinder that is used for the test.
For the usual type, which fits between the plug and plug cap, first switch off the engine.
Pull the cap - not the easily damaged lead - off the plug. Fit the connector to the top terminal of the plug, and the cap to the top of the connector.
Inductive connection
Some strobes have an inductive trigger that clips round the plug lead.
With the more expensive induction-trigger type, it does not matter whether the engine is running or not. Clip the connector round the plug lead.
Checking the timing
If necessary, disconnect the vacuum-advance tube. Start the engine and get it to run steadily at the correct speed for the test.
If you are timing from a static figure only, temporarily adjust the carburettor idle-stop screw (See Adjusting an SU carburettor) to give the slowest idle speed at which the engine will run steadily.
Point the light at the timing marks. If the timing is right, the appropriate mark should appear stationary in line with the fixed pointer. If not, adjust the timing until it does so.
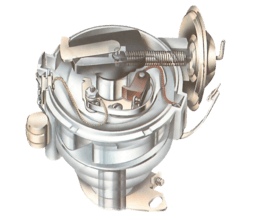
If you have an advance curve of figures for several speeds, you may have managed to get the timing correct for one speed but found that it is not right at other speeds. This is a sign that the centrifugal-advance system in the distributor may be faulty or sticking (How engine timing works).
Adjusting the timing
Stop the engine. Loosen the distributor clamp bolt slightly - just enough to allow you to turn the distributor.
Do not turn the distributor yet, and do not slacken the bolt so much that the distributor turns by itself when the engine is running. Start the engine again and allow it to settle down to a steady idle speed.
Hold the distributor by the lower part of the body. If you hold it by the cap there may be a slight leak of high-voltage electricity even from the plastic outside of the cap, enough to give you a sharp shock. As an extra precaution you can wear rubber gloves.
Turn the distributor to advance or retard the ignition. If the number of degrees before top dead centre shown by the timing light is too small, advance the ignition by turning the distributor in the opposite direction from the way its contact-breaker cam turns.
If the amount of advance is too large, retard the ignition by turning the distributor the other way. Watch the timing marks under the strobe light all the time you are adjusting the distributor. When the marks line up, stop adjusting the distributor and turn off the engine.
Taking care not to disturb the distributor setting, tighten its clamp bolt. Start the engine again and give the timing a final check.

