Vous pourriez avoir besoin de
If a check of the rack gaiters reveals that the rubber is starting to crack, split or perish, replace the gaiter.
A hole letting in water and dirt, or allowing lubricant to leak out, will cause rapid wear and will eventually ruin the rack — an expensive item.
Both gaiters should be renewed, even if only one is damaged.
You can do the job yourself on most cars fitted with rack-and-pinion steering, but not on some old VW models such as the Passat, Golf, Scirocco, late model 1303 Beetle (others do not have racks) and Audi 80 and 100.
This video course is the best way to learn everything about cars.
Three hours of instruction available right now, and many more hours in production.
- 4K HD with full subtitles
- Complete disassembly of a sports car
These have gaiters in the middle of the rack on each side of the pinion housing, and to replace them the whole assembly has to be stripped, refitted and reset by a garage.
The rack may be filled with either oil or grease. Check your car handbook for the correct grade of lubricant.
Preparing to remove the gaiter
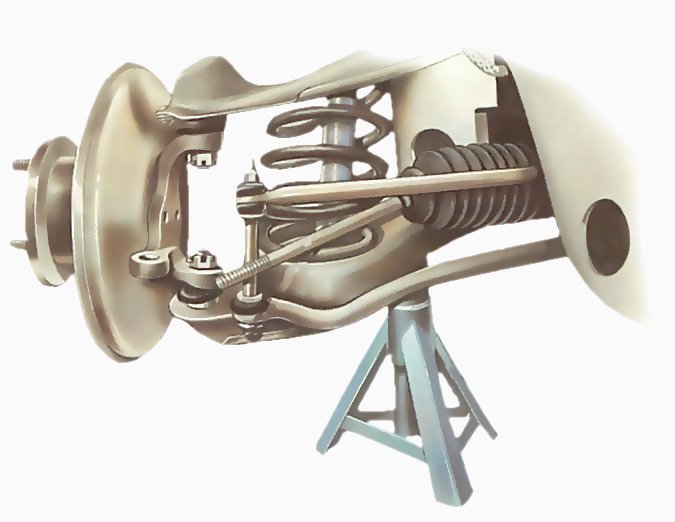
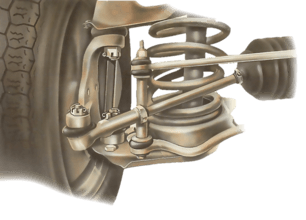
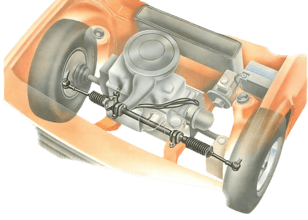
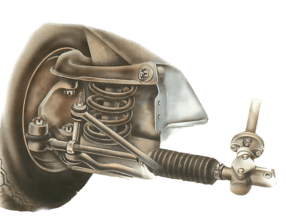
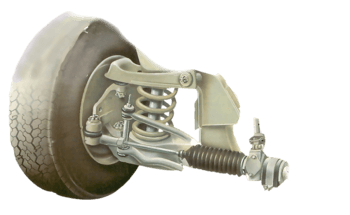
A typical wishbone-type front suspension with rack-and-pinion steering.
Loosen the front wheel nuts, jack up the front of the car and support it on axle stands. Apply the handbrake and chock both rear wheels. Put rear-wheel-drive cars in bottom gear (park for automatics).
Remove the front wheels and unfasten the outer track-rod ball joints (See Replacing track-rod-end ball joints).
Use a rag to clean the rack and track rod at either end of the gaiter.
If the gaiter is held on with screw clips, note where and which way round the screws are, so that you can refit them in exactly the same way.
Measuring the gaiter
Measure or mark the position of the end of the gaiter.
Also note the place on the track rod to which the outer end of the gaiter reaches. Sometimes this is marked by a groove - if not, measure its distance from some fixed point on the rod.
The gaiter must be fitted correctly or it will be overstretched by the rack movement.
Removing a gaiter
Loosen clip or untwist or cut off wire clips. Replace with worm-drive screw clips.
Loosen clip or untwist or cut off wire clips. Replace with worm-drive screw clips.
As you pull the gaiter back, prepare for a flow of oil - have a container ready under the gaiter.
If the rack contains oil, place a container underneath the gaiter, ready to catch a rush of oil when the gaiter is loosened.
Gaiters may have wire or worm-drive screw clips. Untwist or cut through wire clips and throw them away. Never reuse a wire clip.
Special clip
Some gaiters have a special wire spring clip.
Replacements may be supplied with the new gaiter. If not, buy worm-drive screw clips of the appropriate size - they are much more efficient than the wire ones, though a little more expensive.
If screw clips are already fitted, loosen them enough to release both ends of the gaiter. Push the inner clip off to the end of the rack and leave it there.
Pull the inner end of the gaiter off the rack housing. There may be a rush of oil. Help it to drain by turning the steering slowly from lock to lock.
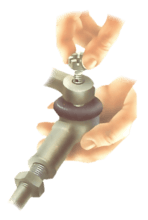
Disconnect the ball joint from the other end of the track rod (See Replacing track-rod-end ball joints).
Slide the gaiter off the track rod. Remove the outer screw clip to use on the new gaiter. If left and right gaiters are different, remember which is which.
Cleaning, inspecting and replacing gaiters
Hang the clip off the rack end.
Carefully inspect the track-rod inner ball joint, to make sure that grit has not penetrated the gaiter and damaged the joint.
Wipe away any dirty grease and replace it with fresh grease.
Smear grease inside the gaiter.
The car handbook or a service manual will tell you the grade of grease or oil, and how much to use (oil should be replaced later, when the new gaiters are fitted).
Check the joint for wear by pushing and pulling it. If there is any play, or if the joint is damaged, fit the new gaiter and take the car to a garage as soon as possible for the rack to be replaced.
Ease the gaiter into place on the rack housing.
Make sure that the end of the rack housing and the track rod are perfectly clean, so that no dirt can get into the new gaiter.
If you are replacing both gaiters, and if there is a difference between the left and right ones, compare new and old gaiters to find which is which.
Tighten the clip firmly, but not too much.
If you are reusing the old gaiter screw clips, see that they are sound, uncorroded and clean. Smear a little grease on the screw thread.
If you are fitting new gaiter clips, open the larger clip to the required size. Hang the clip on the rack housing - with the screw right way round.
Smear a little grease inside the larger end of the new gaiter to make it easier to pull on to the rack housing.
Slide the gaiter up the track rod and ease it on to the rack housing. Make sure that it is squarely in place.
Position the small end of the gaiter accurately, then tighten the clip.
Slide on the clip and move its screw around to the right position. Tighten the screw firmly, but not enough to pinch the rubber.
If you are replacing a wire clip with wire, wind it around the gaiter at least twice, and pull it tight before you twist the ends together. Avoid tightening so much that it cuts into the gaiter.
Slide the outer end of the gaiter into its right place, either a groove or a previously measured spot.
Fit the new outer clip, but before tightening it check that the gaiter is not twisted or misplaced by watching it as you or a helper turn the steering slowly from lock to lock.
If the rack is an oil-filled type, fill it with the recommended quantity and grade of oil.
Tighten the gaiter clip, with the screw correctly placed and not overtightened, to avoid damaging the rubber.
Screw on the track-rod ball-joint locknut (if any) and the ball joint itself, replacing it exactly as it was before (See Refitting track rods and ball joints). Reconnect the ball joint to the steering arm.
As soon as you can, have the wheel alignment checked by a garage or steering specialist.

