Vous pourriez avoir besoin de
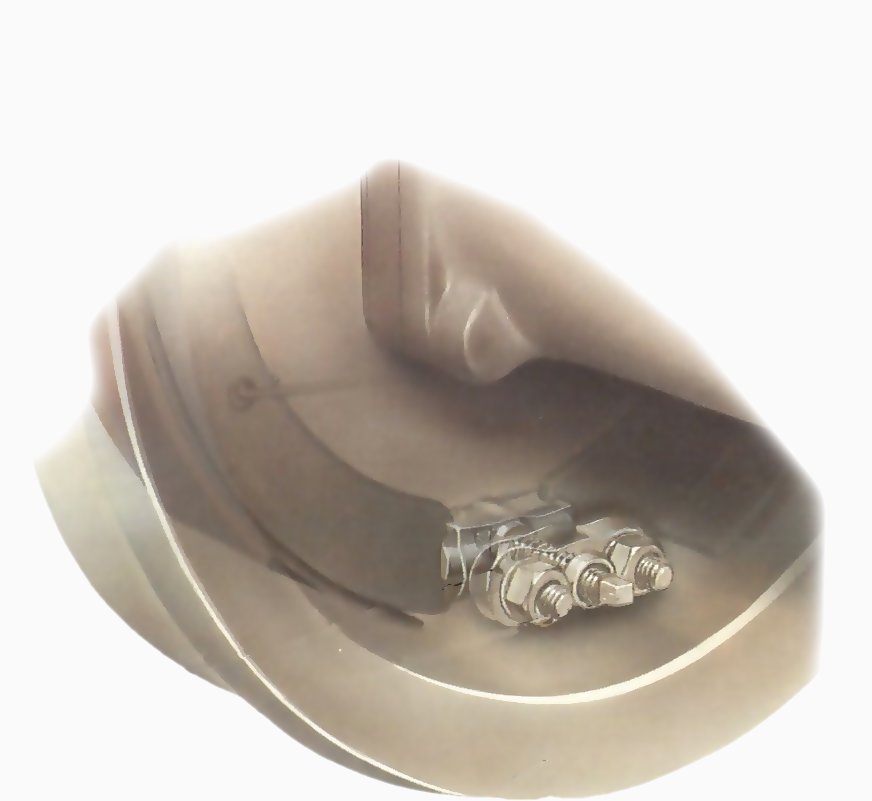
Wedge adjuster
Turning the square peg clockwise drives a wedge between two pistons and forces the shoes apart.
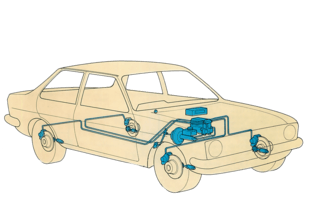
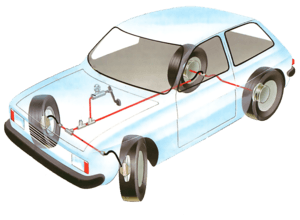
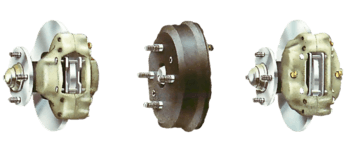
A typical braking system uses disc brakes at the front of the car and drum brakes at the rear.
Usually the handbrake operates on the rear shoes by means of a mechanical linkage — a cable and some levers and pivots.
Wheels are always raised — and in many cases removed — to make brake adjustments. Raise the car at the jacking point nearest to the wheel you are working on, and support it on an axle stand.
This video course is the best way to learn everything about cars.
Three hours of instruction available right now, and many more hours in production.
- 4K HD with full subtitles
- Complete disassembly of a sports car
The brake pads on disc brakes adjust automatically for wear, whether the car has disc brakes on the front wheels only or on all four.
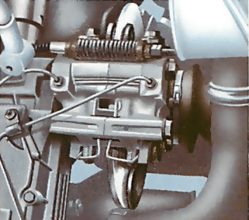
Automatic adjuster
Automatic adjusters work from the handbrake or footbrake. Each time the brake is applied a lever turns a ratchet wheel and adjusts the brake shoes. The adjuster has a device to prevent over-adjustment.
On some cars with rear drum brakes, there is automatic adjustment of the shoes as the linings wear down, so keeping the contact surface of the shoes close to the drum and reducing brake pedal travel.
Where the drum system is not self-adjusting, you can move the shoes closer to the inner surface of the drum as the lining material wears down.
They need adjusting when there is an increase in the travel of the brake pedal before the brakes come on.
Drum-brake shoes are adjusted so that each shoe almost touches the drum inside. A touch on the brake pedal makes each shoe press against its drum instantly.
As the brake linings wear down, the footbrake pedal travel increases, so adding to your braking time.
Brake pedal travel is excessive if the pedal reaches the floor before the brakes lock, and you need to pump the pedal to restore full braking power.
Most manually adjusted drum brakes have a single adjuster, but some — especially if they are on the front wheels — have two.
Look at the brake backplate, behind the wheel and drum. If there are two brake pipes, or a bridge pipe across the backplate, it has two hydraulic wheel cylinders and may have two adjusters.
Cam adjuster
An adjuster peg through the brake backplate turns a snail cam against a peg on the brake shoe.
Frequently the end of the adjuster is a square-ended rod that comes out of the backplate, and the adjuster may be a wedge or snail-cam type. Some may have a hexagonal end.
The ends are often partly recessed or otherwise obscured, making them difficult to adjust with an open-ended spanner. To avoid damaging the adjuster, always use the correct brake spanner for the car.
Star-wheel adjuster
A star-wheel adjuster turns on a threaded rod which pushes the brake shoes apart.
The adjuster may also be a star wheel accessible through a hole in the backplate or the front of the brake drum. You may have to take the wheel off to reach it.
The adjusters are exposed to weather and dirt, and are prone to seizure. Lubricate them with penetrating oil an hour or two before you start work, and again just before you turn them.
Disc-brake pads are always in light contact with the . This can be felt or heard if you spin the front wheel with the car jacked up.
As the friction material wears down, the piston or pistons in the brake caliper moves towards the disc, thereby taking up the wear on pads or discs or both. No adjustment is possible.
But such a system is not always perfect. The piston can partly or totally seize in the caliper, so that when you press on the footbrake it does not readily push the disc pad against the disc.
When the piston is partly seized, it may be jerked free at full pedal pressure. During the delay, uneven braking may cause the car to slew or start to spin, particularly on slippery surfaces when only moderate braking effort is applied.
Adjusting a star wheel
Remove the plug in the backplate to gain access to the star-wheel adjuster.
If you have to take the wheel off to reach the adjuster hole, loosen the wheel nuts before raising the car at the nearest jacking point, and supporting it on an axle stand.
Remove the plug in the backplate if the access hole is on that side, and turn the star wheel with the tip of a large flat screwdriver.
Use a large screwdriver to turn the star wheel.
Check with your car handbook to find the direction to turn the adjuster. Otherwise, move it several teeth. This should be enough to make the brake shoes jam against the drum, and no further movement is possible. If the brake does not jam, move the star wheel the other way.
Back off one or two clicks, or until the wheel just spins freely.
Backing off an automatic adjuster
Turn the hexagonal bolts on the backplate to back the shoes off the drum.
Automatic adjusters keep the brakes in correct adjustment all the time, but if you have to remove the brake drum for any reason, you may want to back off the adjustment a little to make the job easier.
Some cars, notably Vauxhalls, make allowance for this.
The brake drum can then be removed to reveal the shoes and automatic adjustment mechanism.
With the car raised and supported on axle stands, and the wheel removed, turn two hexagonal bolts on the rear of the backplate. The bolts are turned towards each other, backing the shoes away from the drum. Only a little adjustment is necessary.
After reassembly, it is necessary only to operate the foot and handbrake to restore the proper brake adjustment.
Adjusting a snail cam
Turn each adjuster clockwise a small amount at a time to bring the shoes closer to the drum.
Press hard on the footbrake several times to centralise the brake shoes inside the drum. Raise the car at the nearest jacking point and support it on an axle stand.
Lubricate the adjuster with light oil. To move the shoes closer to the drum, turn the adjuster clockwise, as viewed from behind the backplate. (This is the usual direction, but may not be true for every type - consult your car handbook.)
Turn until you feel resistance, then try to turn the wheel. It should be locked.
Turn the adjuster back one click setting at a time until you can spin the wheel freely; a slight sound as the shoes touch a high spot inside the drum is permissible.
Remember that there will be a certain amount of drag on the driven wheels caused by the transmission gearing. Spin the wheel before making the adjustment so that you will recognise the amount of drag.
Repeat the adjustment on the other wheel or wheels of the car as necessary to ensure braking balance.
Turning a wedge adjuster
As you adjust, spin the wheel until it locks, then readjust gradually until the wheel rotates freely.
Wedge adjusters are similar to the snail-cam type in that a square shaft protrudes from the backplate.
Inside the drum, the wedge adjuster has a tapered inner end. As this is screwed in or out, it moves the shoes further apart or allows them to close up.
To adjust, raise the wheel affected and support the car on an axle stand.
Make the adjustment with a brake spanner. The direction of the turn may be clockwise or anticlockwise.
On the front wheel, turn the adjuster in the direction of forward wheel rotation. On a rear wheel, turn in the direction specified by the manufacturer in the car handbook or a service manual.
The amount of turning required is normally very small.
Lubricate the exposed part of the adjuster shaft with light oil. Turn the shaft while spinning the wheel. When the wheel locks, back off the adjuster until you can hear the shoes just touching and the wheel spins freely.
Freeing a disc-brake piston
On a fixed caliper disc brake, two cylinders placed one on each side of the disc operate the pads.
Jack up the suspect wheel and spin it by hand. If it spins freely, with no drag (except perhaps from the final drive), get a helper to press gently on the footbrake pedal. The wheel should stop almost as soon as the pedal is touched.
If it does not, remove the wheel and look at the brake pads. If you see a gap between one or both pads and the disc surface, the piston is stuck in.
The piston can also jam in the 'on' position, so that the pads are held tightly against the disc.
This causes drag on that wheel, uneven braking, rapid pad wear and increased fuel consumption.
To check for jamming, apply the footbrake, release it and try to to turn the wheel. After a slight stiffness for part of a turn, it should spin freely. If it does not, the brake has jammed in the on position.
The only cure for a seized piston is to dismantle and clean the unit. A job best left to a garage. Often the jamming is caused by bad wear, corrosion or scoring on the piston and internal parts or both, and a new caliper assembly is needed.
The sliding caliper system has one cylinder with two pistons. One piston applies one pad and the other works the second pad through a sliding yoke.
There is a second cause of lack of pad contact, or too much contact, if your car is fitted with moving calipers - alternative names are 'floating', 'sliding' and 'swinging' calipers.
With this type the pistons are on one side of the caliper and there is a little movement of the caliper body to keep the pad pressure balanced in use. Dirt and corrosion can cause the action to stick.
To cure it, clean all external moving parts and apply a proprietary grease recommended by the manufacturer, consult the agent for the make.

