Vous pourriez avoir besoin de
Anti-roll bar
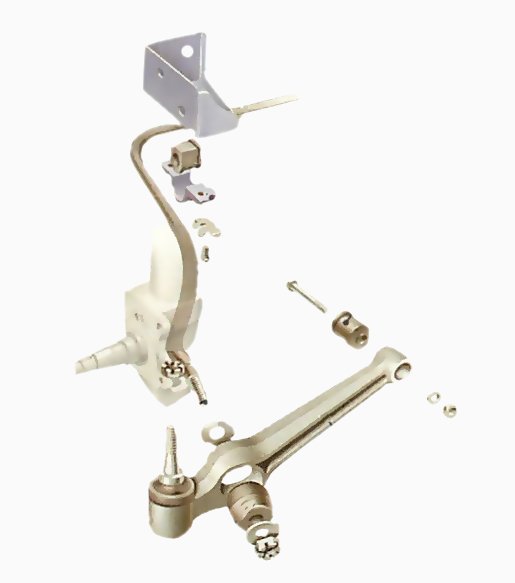
The forces imposed on the anti-roll bar subject it to constant twisting and flexing, which in turn put its various rubber mounting bushes under great load. The bushes gradually wear and lose their effectiveness. Over a period of years the rubber hardens and tends to crack.
If oil is allowed to contaminate the bushes, it softens them rapidly and they may even disintegrate.
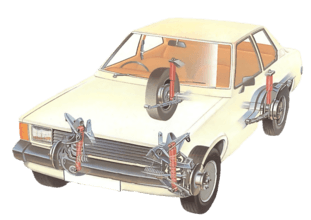
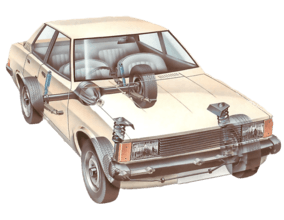
Anti-roll bars are sometimes fitted only to the front suspension, but many cars also have them fitted to the rear suspension.
This video course is the best way to learn everything about cars.
Three hours of instruction available right now, and many more hours in production.
- 4K HD with full subtitles
- Complete disassembly of a sports car
Check all the anti-roll-bar bushes at the intervals recommended in the service schedule for the car, or at intervals of 6,000 miles (10,000km) or six months.
If any bush is damaged or worn, replace it - and the corresponding bush on the other side of the car. If one is damaged, the other is probably in poor condition too.
Any bushes that are split lengthways can usually be renewed without removing the bar completely. If the bush is not split, the bar must be removed.
Drive the front or rear of the car up on ramps or over an inspection pit.
Checking for wear
With the car firmly supported on axle stands and with the road wheels off, take hold of the anti-roll-bar components and push and pull vigorously. If you can move anything by hand, the bushes are worn.
If you use ramps, make sure the handbrake is applied firmly and that the wheels still on the ground are chocked.
The weight of the car on the suspension reduces the load on the anti-rollbar mounts and makes them easier to unbolt and refit.
Another way to replace bushes
However, you may find the road wheels prevent you from reaching some of the bushes, so the wheels should be removed. In that case, raise the car by a different method - which can also be used if you do not have ramps or a pit.
Loosen the wheel nuts at the end you are working on, jack up the car and support it on axle stands under the chassis members. Remove the road wheels.
Jack up each lower suspension arm and support it to reduce the load on the anti-roll-bar mounts.
Unscrew the nuts or bolts which hold the U-clamps and their bushes to the floor pan. Make a careful note of the number and position of the components as you remove them.
Pull the anti-roll bar down, pull off the bushes if they are the split type. If they are not split, free the end of the bar from its mounting on the suspension arm and pull the bush along the bar and off.
It may be easier to cut the old bushes free, or they may be lubricated with soap solution to ease them along the anti-roll bar.
If you have to replace the end bushes on the anti-roll bar, you may have to remove the complete bar.
Fitting eye bushes
New eye bushes can be drawn into place with a socket, a long bolt and a large washer.
The socket should be of slightly larger diameter than the bush. Put the socket at one side of the eye into which you are fitting it, and the bush at the other side.
Pass the long bolt through the socket, the eye and the bush. Fit the washer and the nut and tighten the whole assembly. This draws the new bush into place.
The bushes on the short vertical links to the anti-roll bar can be dealt with in the same way. Sometimes they are eye fittings, others fit around the shaft of the link itself.
Align the new bushes with the marks worn on the bar by the old ones. Refit the various shims, washers, clamps and bolts, and push the bar up towards the floor pan, or cross member.
Screw in the mounting bolts. Make sure that they are fully tightened.
In some cases, these nuts or bolts should be tightened with a torque wrench to a specific torque setting. The figure will be given in a service manual for the car - otherwise, ask your local dealer.
When you have replaced the bushes, remove the wheel chocks and lower the car to the ground.
Removing vertical links
The anti-roll bar is sometimes connected to the suspension by short vertical links.
If the anti-roll bar is connected to the suspension by short vertical links, you may be able to replace their bushes by removing the links without disturbing the main bar.
Inspect them carefully - you should be able to judge whether removal is possible. If in doubt, consult the car service manual.
Whatever the layout of the links, jack up the end of the car and support it on axle stands.
In some cases the ends of the bar are threaded, and pass through a bush in the arm. A locknut is fitted to the end of the bar to hold it in place. Remove the nut and pull the bar out.
There may be eye fittings at each end of the bar, which is held to a bracket on the suspension arm or axle by a pivot bolt. Unscrew and remove the bolt.
Make a careful note of all washers, shims and spacers that make up the mounting; they must be replaced in exactly the same order as they came off. Always renew any locknuts.
Rear-suspension types
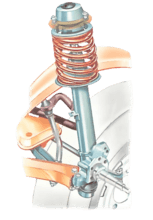
On some cars the anti-roll bar is attached to the axle and the chassis.
The anti-roll bar may be attached to the rear suspension arms.
With torsion-bar suspension, the anti-roll bar is attached to the torsion arms.
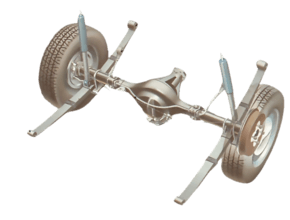
Anti-roll-bar mounts vary from car to car. Some bars form a link across the rear axle and attach to the suspension arm on each side.
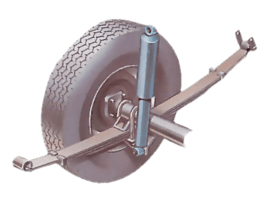
Others may link the leaf springs, passing over the axle tube with firm mountings on chassis members or floor pan.
On torsion-bar suspension, the anti-roll bar runs from one arm to the other, the central part again being clamped to the floor pan.
Fitting end pins or eye bolts
Some anti-roll bars have end-pin or eye bolt fittings.
The rubber bushes take the shocks, and should be renewed if they are worn.
Some anti-roll bars have end-pin or eye bolt fittings.
Some anti-roll bars have vertical links at the ends connected to the suspension. The links may have end-pin fittings, or eye-bolt fittings.
The pin fitting in particular may have a distance piece in the form of a tube between two washers or endplates.
The distance pieces take the load, while the rubber bush takes the shocks - do not forget to replace the distance piece when you fit new bushes.
With the car raised on axle stands, use a jack under the suspension arm to take the load off the anti-roll bar, so that it does not fly apart violently when a mounting clamp is released.
The jack can also be used to raise or lower the arm to help in aligning the vertical link with a mounting hole.
Use a vice to press new bushes into a rod with an eye mounting by squeezing the bush into the eye.
Removing the bar
Use a socket spanner to slacken the U-clamp mounting bolts.
Look underneath the car to find the U-clamps which hold the anti-roll bar to the floor pan or suspension cross member.
Make a careful note of any washers, spacers and other parts of the mounting. Make sure that they are replaced in exactly the same way.
Remove washer clamps, spacers and other parts, keeping them in order.
Check the position of the bushes and, in particular, the position of any marks or splits in the rubber bushes in relation to the bar, so that you can fit the new bushes in exactly the same way.
Use a socket spanner to slacken the U-clamp mounting bolts and nuts.
If you do not have a socket, use a ring spanner. Use an open-ended spanner only as a last resort, for these nuts and bolts tend to be misshapen due to corrosion, and need the best grip possible.
Use a bar to prise away the anti-roll bar, so that you can slip the new bush into place.
Remove the nuts, bolts, washer clamps and spacers from each mount, at each end and towards the centre of the bar. Collect all the pieces and keep them in the correct order.
Pull the anti-roll bar downwards from the floor pan or cross member until there is sufficient clearance to take it out.
Take all the old rubber bushes off. Lever each one off with a screwdriver or similar tool if they do not slip off easily.
Wipe the bar clean. Coat it with soap solution to lubricate the path for the tight new rubber bushes.
Press each new rubber bush over the anti-roll bar. Make sure that the split in the rubber bush faces in the same direction as the old one, if applicable, and that the new bushes fit over the wear marks left by the old bushes.
Removing the bar from a rear-spring mounting arm
The anti-roll bar is secured underneath the mounting arm.
On some cars the rear anti-roll bar is secured underneath the independent coil-spring mounting arm. Place a jack under the arm to take the load off the suspension, and unscrew the pair of nuts securing the through-bolts.
Adjust the jack until there is no load on the anti-roll bar, at which point the bolts should push out freely. The bar will then pull down.
Because of changes in suspensions attitude after you have taken the bar off, you my need a second jack to help reposition the anti-roll bar under the suspension arm when the bar is replaced.

